
How to install a toilet – DIY
Here are the steps for a new Toilet Installation
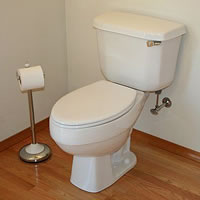
Every home owner has one or more toilets in their home. Toilet installation can be easy if you follow these simple steps. If you can not finish the toilet installation, call your local plumber. They will have the tools needed for a toilet installation.
1. With a hacksaw cut the soil stack if necessary so it is even with the finished surface of the floor.
2. Place the closet flange onto the drainpipe.
3.Remove the closet flange and apply it to the inside of the closet flange and the outside of the soil pipe. Apply PVC cement to surfaces, then reseat the closet flange onto the soil pipe. Quickly rotate the closet flange before the cement sets until the slots are positioned parallel to the wall behind the tank.
4. Using stainless steel screws, bolt the closet flango.
5. Place two closet bolts into the flange’s collar slots with the threads pointing up. With its flat side down, position the wax ring over the closet flange.
6. Position toilet over the flange and lower it so the bolts pass through each hole on both sides. Gently press the toilet down into the wax seal by slowly rocking it back and forth. Place a washer onto each bolt and tighten a nut on each bolt with a box wrench until the toilet sits flush with the floor.
7. Trim the bolts with a hacksaw, only 1/2 inch protrudes should be above the nuts. Pack the plastic bolt covers with plumber’s putty and snap them onto the bolts to hide the nuts.
8. Connect the over braid hose by hand-threading it to the angle-stop connection and the tank coupling, then tighten the connections with a box wrench.
9. Open the supply valve and test the new toilet.